Complete Guide: Setting Up Booking with Lynxbe

Complete Guide: Setting Up Booking with Lynxbe
In today's fast-paced world, effective time management is crucial for businesses of all sizes. Lynxbe's Booking module offers a comprehensive solution for online appointment scheduling and service management, designed to streamline operations and enhance customer interactions. This guide will walk you through the process of setting up the Booking module, ensuring that you harness its full potential to benefit your business.
1. Introduction — What Booking Does and Who Benefits
The Booking module allows businesses to manage appointments seamlessly, providing an online booking page that customers can access 24/7. This module is particularly beneficial for service-oriented businesses such as:
- Health clinics and medical practices
- Beauty salons and spas
- Restaurants and cafes
- Real estate agencies
- Retail stores offering personal shopping experiences
With features like service and staff management, calendar synchronization, and automated reminders, Lynxbe's Booking module is designed to enhance customer satisfaction while simplifying your scheduling processes.
2. Prerequisites and Setup Requirements
Before diving into the setup process, ensure that you have the following prerequisites in place:
- A Lynxbe account with access to the Booking module.
- A list of services you want to offer, including duration and pricing.
- Staff information, including availability and roles.
- A calendar account (Google Calendar, Outlook, etc.) if you want to enable calendar synchronization.
Once you confirm that you have these prerequisites, you are ready to proceed with the setup.
3. Step-by-Step Setup Guide
Step 1: Access the Booking Module
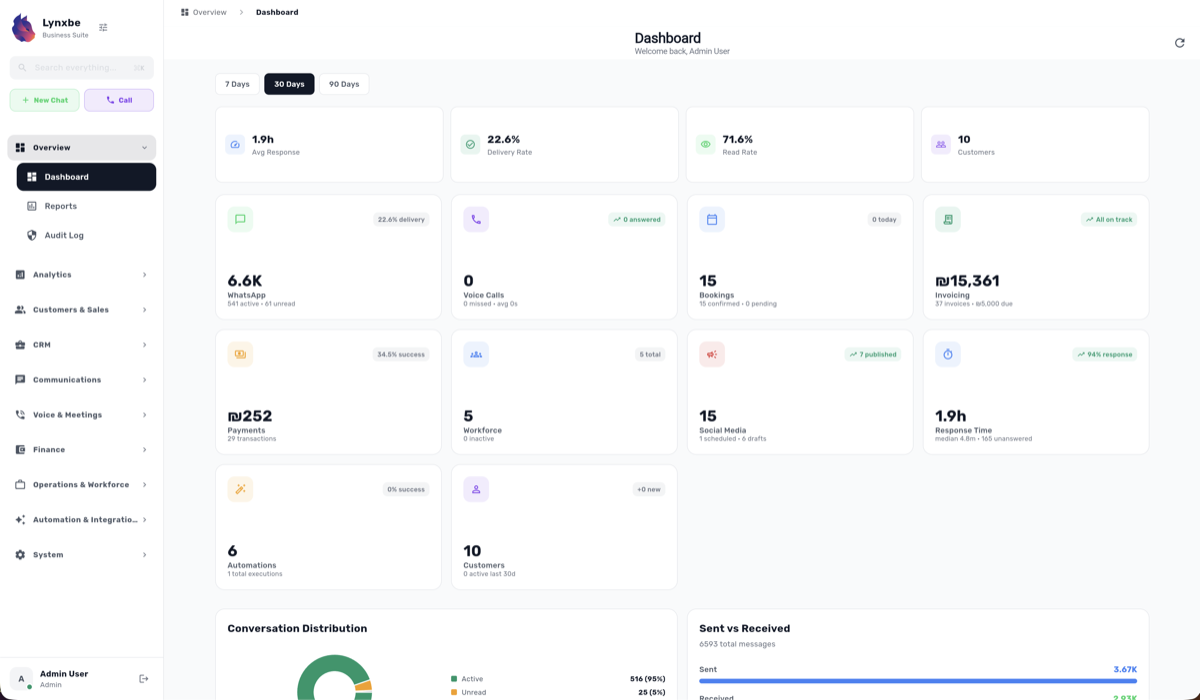
Log in to your Lynxbe account. Navigate to the dashboard and locate the Booking module. Click on it to enter the setup interface.
Step 2: Set Up Your Online Booking Page
In the Booking module, go to the "Booking Page" section. Here, you can customize the appearance and settings of your online booking page:
- Select a template that matches your brand aesthetics.
- Configure your business hours to inform customers when they can book appointments.
- Add your business logo and contact information.
Step 3: Define Your Services
Next, navigate to the "Services" section. Here, you will add the services you offer:
- Click on "Add New Service."
- Provide the service name, description, duration, and price.
- Set the staff who will provide this service and their availability.
Step 4: Manage Your Staff
In the "Staff Management" section, you will add and manage your staff members:
- Click on "Add Staff." Enter their name, role, and contact information.
- Set their availability by choosing the days and times they can take appointments.
- Assign services they are qualified to provide.
Step 5: Enable Calendar Sync
To ensure that all appointments are synchronized with your personal calendar, go to the "Calendar Sync" settings:
- Select your calendar service (Google Calendar, Outlook, etc.) and follow the prompts to connect your account.
- Choose whether to sync all events or only appointments created through Lynxbe.
Step 6: Set Automated Reminders
Automated reminders help reduce no-shows and keep your customers informed:
- Navigate to the "Reminders" section in the Booking module.
- Customize reminder settings such as email or SMS notifications and the timing of these reminders (e.g., 24 hours before an appointment).
Step 7: Test Your Booking Page
Once everything is set up, it’s time to test your booking page:
- Open your booking page link in a new browser tab.
- Try booking an appointment to ensure everything works as expected.
- Verify that the appointment appears in your synced calendar.
Step 8: Go Live
After testing, you can officially go live with your booking system. Share the booking page link with your customers via your website, social media, or email newsletters.
4. Configuration Tips and Best Practices
To maximize the effectiveness of your Booking module setup, consider the following tips:
- Regularly Update Services: Keep your service offerings current, and adjust prices or descriptions as necessary.
- Staff Training: Ensure your staff is trained on how to use the system and understand their schedules.
- Monitor Appointments: Regularly check your appointment logs and customer feedback to identify areas for improvement.
- Promote Your Booking Page: Use social media and email campaigns to drive traffic to your booking page and encourage online appointments.
5. Common Use Cases by Industry
Different businesses can leverage the Booking module in unique ways:
Restaurants
Restaurants can use the Booking module to manage reservations. By allowing customers to book tables online, restaurants can improve customer satisfaction and reduce wait times. Automated reminders can also help reduce no-shows.
Clinics
Medical clinics can streamline patient scheduling, allowing patients to book appointments online. Automated reminders can minimize missed appointments, improving overall patient flow.
Real Estate
Real estate agents can use the Booking module to schedule property viewings. Clients can select available time slots, making the process more efficient and user-friendly.
Retail
Retailers offering personalized shopping experiences can use the Booking module to schedule appointments, allowing customers to receive one-on-one attention and tailored services.
6. Troubleshooting Common Issues
If you encounter issues while using the Booking module, consider the following troubleshooting tips:
- Appointment Not Showing in Calendar: Ensure your calendar sync settings are correctly configured. Double-check the permissions granted to Lynxbe.
- Customers Unable to Book: Review your booking page settings and confirm that your business hours and services are correctly defined.
- Automated Reminders Not Sending: Verify that the reminder settings are active and that customer contact information is accurate.
7. Integration with Other Lynxbe Modules
Lynxbe offers several modules that work seamlessly with the Booking module, enhancing your overall business operations:
- CRM Module: Integrate with the CRM module to manage customer relationships and track appointment history.
- Marketing Module: Utilize the marketing module to promote your services and booking page to a wider audience.
- Analytics Module: Analyze booking data to gain insights into customer behavior and improve your service offerings.
8. Conclusion with Next Steps
Setting up the Booking module in Lynxbe can significantly enhance your business efficiency and improve customer satisfaction. By following this comprehensive guide, you’ll be able to create a seamless appointment scheduling experience for your clients. Remember to promote your new booking system and utilize integrated modules to maximize its effectiveness.
As a next step, consider scheduling a training session for your staff to ensure they are well-versed in using the Booking module. Additionally, gather customer feedback on the new booking process to make continuous improvements. With Lynxbe's Booking module, you are well on your way to transforming how your business manages appointments.


Comments
💬 Share your thoughts