Complete Guide: Setting Up Marketing with Lynxbe

Introduction
In today's digital age, effective marketing is crucial for businesses to thrive. Lynxbe's Marketing module offers a comprehensive suite of tools designed for email campaigns, social media management, and marketing analytics. Whether you're a small startup or an established enterprise, this module helps you engage your audience, drive sales, and analyze your marketing efforts efficiently.
Prerequisites and Setup Requirements
Before you begin setting up the Marketing module in Lynxbe, make sure you have the following:
- A Lynxbe account with access to the Marketing module.
- A list of your target audience, including email addresses and social media profiles.
- Basic knowledge of marketing concepts and strategies.
- Any existing marketing materials (like logos, images, and content) that you want to use.
Step-by-Step Setup Guide
Step 1: Access the Marketing Module
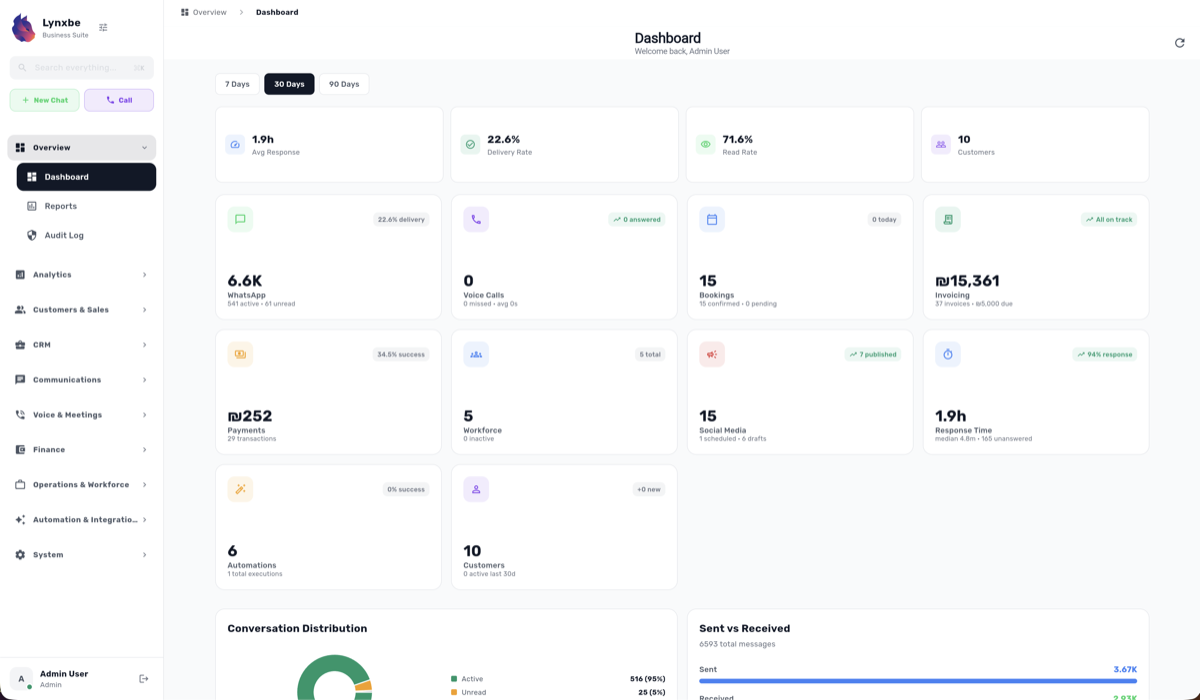
Log in to your Lynxbe account. From the dashboard, navigate to the Marketing module. Here, you will find various features designed to optimize your marketing efforts.
Step 2: Setting Up Email Marketing Campaigns
1. Click on "Email Campaigns" in the Marketing module.
2. Select "Create New Campaign."
3. Choose a template or start from scratch. Lynxbe offers a variety of customizable templates.
4. Add your content, including subject lines, email body, and any images or links.
5. Segment your audience by selecting specific groups or demographics for this campaign.
6. Preview your email and send a test email to ensure everything looks good.
7. Schedule your campaign or send it immediately.
Step 3: Managing Social Media
1. Navigate to "Social Media Management" within the Marketing module.
2. Connect your social media accounts (Facebook, Instagram, etc.) if you haven't already.
3. Create a new post by clicking on "Create Post."
4. Write your post content, and attach images or videos as needed.
5. Choose whether to publish immediately or schedule for a future date.
6. Use the analytics feature to review engagement metrics after posting.
Step 4: Analyzing Campaign Performance
1. After your campaigns have been sent out, access the "Campaign Analytics" section.
2. Review key metrics such as open rates, click-through rates, and conversion rates.
3. Compare different campaigns to understand what strategies work best.
4. Use this data to refine future campaigns for better results.
Step 5: Audience Segmentation
1. Go to the "Audience Segmentation" feature within the Marketing module.
2. Create segments based on demographics, interests, or behaviors.
3. Import your audience data if necessary, ensuring you comply with privacy laws.
4. Utilize these segments when creating email campaigns or social media posts to target specific groups effectively.
Step 6: Utilizing New Features
1. Explore the newly introduced Ads CLI for Meta ads management.
2. Use the command line interface to create and manage ad campaigns more efficiently.
3. Familiarize yourself with the partially implemented templates such as Media Card Carousel, Limited Time Offer, and Coupon templates for enhanced marketing strategies.
4. Check the documentation for specific API routes and services related to these templates.
Step 7: Testing and Optimization
1. Perform A/B testing on your emails and social media posts to identify the most effective content.
2. Monitor engagement metrics closely and adjust your strategies based on real-time data.
3. Solicit feedback from your audience to improve future campaigns.
Step 8: Final Review and Launch
1. Before launching your campaigns, review all elements: content, audience segmentation, scheduling, and analytics setup.
2. Ensure all links work and images display correctly.
3. Launch your campaigns and monitor them closely for initial results.
Configuration Tips and Best Practices
To maximize the effectiveness of the Marketing module, consider these best practices:
- Regularly update your audience lists to ensure accuracy.
- Utilize a consistent brand voice across all marketing channels.
- Schedule campaigns during peak engagement times based on your target audience.
- Utilize visuals effectively; high-quality images and videos can significantly improve engagement.
- Always include a clear call-to-action in your emails and social media posts.
Common Use Cases by Industry
Restaurants
Restaurants can use Lynxbe to promote special offers, new menu items, and events through email campaigns and social media. For instance, a limited-time offer campaign can drive foot traffic during slow periods.
Clinics
Clinics can segment audiences based on services offered (e.g., dental, physical therapy) and send targeted reminders for appointments or wellness tips. The analytics can help them understand patient engagement and improve service delivery.
Real Estate
Real estate agents can showcase new listings through visually appealing emails and social media posts. Utilizing audience segmentation allows them to target potential buyers more effectively, leading to higher conversion rates.
Retail
Retailers can utilize the Marketing module to send promotional emails, manage social media ads, and analyze customer purchasing behavior to tailor marketing strategies accordingly.
Troubleshooting Common Issues
If you encounter issues while setting up or running your marketing campaigns, consider the following troubleshooting tips:
- Check your internet connection if the platform is slow or unresponsive.
- Review your email content for spam triggers that may prevent delivery.
- Ensure your social media accounts are properly linked and authorized within Lynxbe.
- Verify that your audience segments are correctly configured to avoid sending to the wrong group.
Integration with Other Lynxbe Modules
The Marketing module integrates seamlessly with other Lynxbe modules, enhancing your overall business efficiency:
- Sales Module: Track the performance of your marketing campaigns in relation to sales conversions.
- Customer Relationship Management (CRM): Leverage customer data for personalized marketing efforts.
- Analytics Module: Utilize advanced analytics to gain insights and optimize marketing strategies.
Conclusion with Next Steps
Setting up the Marketing module in Lynxbe is a straightforward process that can significantly enhance your business's marketing efforts. By following the steps outlined in this guide, you will be well on your way to creating effective marketing campaigns that drive results. Remember to continuously analyze your efforts, implement best practices, and stay updated with new features to maximize your marketing success.
Your next steps should include exploring the various features in more detail, creating your first campaign, and integrating with other modules for a comprehensive business approach. Happy marketing!


Comments
💬 Share your thoughts